
 By admin
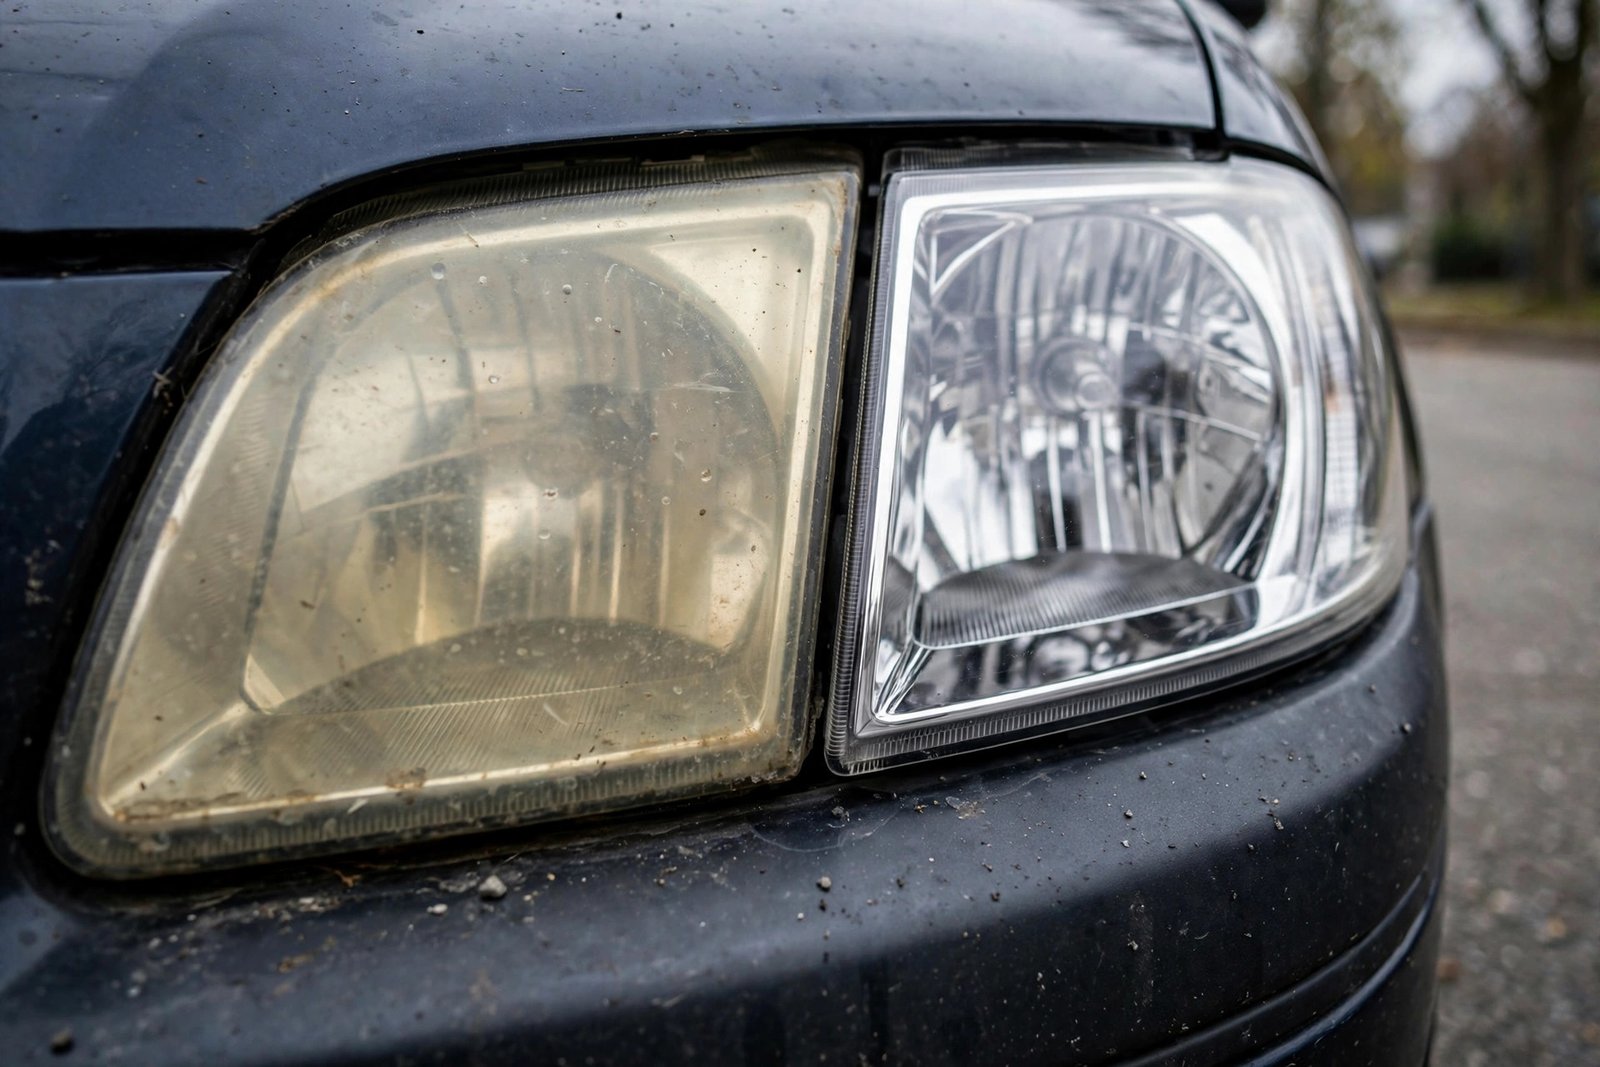
Your headlights used to cut through the night. Now they’re yellow, hazy, and dim — your car’s face has cataracts. Cloudy headlights aren’t just ugly; they’re dangerous. Oxidized lenses can cut light output by 50–80%, turning your high beams into the equivalent of a flashlight with dying batteries. And the fix costs $20 and an hour of your Saturday, not the $300–$600 per assembly a shop charges for replacement.
Headlight yellowing is oxidation — UV damage to the polycarbonate lens and the factory protective coating. It’s inevitable on most cars after 5–8 years, but it’s also one of the most satisfying DIY restorations in car care: the before-and-after is dramatic, the process is straightforward, and the safety payoff is immediate. Here’s the best way to clean headlights that turned yellow, from the quick polish to the full restoration.
Why Headlights Turn Yellow (And Why It Matters)
Modern headlight lenses are polycarbonate plastic — lightweight and impact-resistant, but vulnerable to UV degradation. Manufacturers apply a UV-protective hard coating at the factory; after years of sun exposure, that coating breaks down, and the raw polycarbonate beneath oxidizes into the familiar yellow haze. Heat from the bulbs accelerates the process from inside, while road grime and car wash chemicals attack from outside.
The safety impact is severe and underappreciated: testing shows heavily oxidized headlights can reduce measured light output by more than half. You’re effectively driving with one headlight’s worth of illumination from two assemblies — with correspondingly longer hazard-recognition distances and higher night-driving risk. It’s also an inspection failure in many states and a ticketable equipment violation in others.
Method 1: The Quick Polish (Light Haze, 20 Minutes)
For mild yellowing where the lens is hazy but not deeply oxidized: wash the headlight thoroughly; apply a headlight polishing compound or plastic polish (Meguiar’s PlastX, $10) with a microfiber cloth, working in firm circular motions; buff clean and inspect — repeat 2–3 times for improvement. This removes surface oxidation and restores meaningful clarity for lightly aged lenses. It’s maintenance, not restoration — expect improvement, not transformation. Follow with a UV sealant (below) or the haze returns within months.
Method 2: The Full Restoration (Heavy Yellowing, 60–90 Minutes)
For deeply yellow, rough-textured lenses, you need to remove the failed coating entirely and refinish the surface. This is the method professional detailers use, and kits ($15–$30: 3M, Sylvania, Turtle Wax) include everything needed:
1. Mask the paint. Tape generously around the headlight with painter’s tape — sandpaper near paint is how $20 restorations become $200 touch-ups.
2. Wet-sand in stages. Start with 1000-grit (for heavy oxidation) or 1500-grit, sanding in straight lines with constant water. The lens will look worse — uniformly frosted — which means it’s working. Progress through 2000-grit, then 3000-grit, changing sanding direction each stage (horizontal, then vertical) so you can see when the previous scratches are gone. Keep everything soaking wet throughout.
3. Compound and polish. Apply rubbing compound with a drill-mounted foam pad or by hand, working until clarity returns. Follow with fine polish for optical transparency. The transformation at this stage is startling — frosted white becomes crystal clear.
4. Seal with UV protection — non-negotiable. This is the step everyone skips and the reason restorations fail. The sanding removed the factory UV coating; without new protection, the lens re-yellows in 6–12 months. Apply a dedicated headlight UV sealant (ceramic coatings designed for headlights last longest, 1–2 years; spray sealants need reapplication every 6 months). Kits including UV clear-coat wipes offer the best DIY durability.
Method 3: Professional Restoration ($75–$150)
Detailers and some mechanics offer headlight restoration with professional-grade compounds and (critically) proper UV clear-coat application — often sprayed 2K clear coat, which lasts years rather than months. Worth it when: both headlights are severely oxidized, you value your Saturday more than $100, or previous DIY attempts failed. Ask specifically about their UV protection step — a restoration without proper sealing is a 6-month fix at professional prices.
When to Replace Instead
Restoration has limits. Replace the assembly ($150–$400 aftermarket, $300–$800+ OEM per side) when: the reflector inside is damaged or corroded (no external polishing fixes internal deterioration — check by looking for flaking or dark spots inside the lens); the lens is cracked (moisture intrusion destroys the reflector); the yellowing returns within months despite proper UV sealing (the polycarbonate itself is degraded through its thickness); or the adjusters are broken (aim matters as much as clarity — misaimed bright headlights blind oncoming traffic).
Also consider upgrading to LED bulbs during restoration — but verify legality and beam pattern. Drop-in LED “upgrades” in reflector housings designed for halogens often create dangerous glare; proper LED performance requires housings designed for them. The NHTSA’s lighting standards govern what’s legal — blinding oncoming drivers isn’t just rude, it’s a violation.
Prevention: Keeping Them Clear
After restoration (or on new cars): apply UV sealant every 6–12 months; park in shade or garage when possible (UV is the enemy — garaged cars’ headlights last dramatically longer); wax the headlights when waxing the car (adds sacrificial UV protection); and address haze early — light oxidation polishes off in minutes; neglected oxidation requires the full sanding ordeal. Think of headlight maintenance like dental care: brief regular attention prevents the root canal.
Clear headlights are part of broader night-driving safety — which also depends on proper aim (have it checked if you’ve never had it done; many cars leave the factory misaimed). And while you’re improving visibility, our garage organization guide helps you set up a workspace where maintenance like this actually gets done instead of postponed.
Conclusion
Yellow headlights are oxidized UV coating, not permanent damage — and the fix matches the severity: quick polish for light haze ($10, 20 minutes), full wet-sand restoration for heavy oxidation ($20 kit, 90 minutes), professional restoration when your time is worth more than $100. The non-negotiable step in every method is UV sealing afterward — skip it and you’re repeating the job within a year. Restore them, seal them, maintain them, and your night driving transforms from guesswork back to confidence. Few $20 projects deliver this much safety per dollar.
DIY restoration rewards patience — our guide to cleaning suede shoes at home teaches the same start-gentle-then-escalate approach, and AAA’s vehicle maintenance resources cover when to restore versus replace.
Frequently Asked Questions
What causes headlights to turn yellow?
UV degradation of the factory protective coating on polycarbonate lenses, accelerated by heat, road chemicals, and age. The raw plastic beneath oxidizes into yellow haze once the coating fails — typically after 5–8 years of sun exposure.
Does toothpaste clean headlights?
Slightly — it’s a mild abrasive that can improve very light haze. But dedicated plastic polish ($10) works dramatically better with less effort, and neither approach lasts without UV sealant afterward. Toothpaste is a party trick, not a solution.
How long does headlight restoration last?
With proper UV sealing: 1–3 years (longer with ceramic coatings or sprayed 2K clear coat). Without UV protection: 6–12 months before re-yellowing. The sealant step determines durability more than the polishing method.
Can I use sandpaper on headlights?
Yes — wet-sanding with 1000 to 3000-grit sandpaper is the professional method for heavy oxidation. The keys: keep everything soaking wet, progress through grits sequentially, mask surrounding paint, and always finish with compounding, polishing, and UV sealant.
Is it illegal to drive with cloudy headlights?
Many states fail heavily oxidized headlights at safety inspection, and officers can cite them as equipment violations. Beyond legality, the 50–80% light output reduction is a genuine crash risk — restoration is safety maintenance, not cosmetic vanity.