
 By admin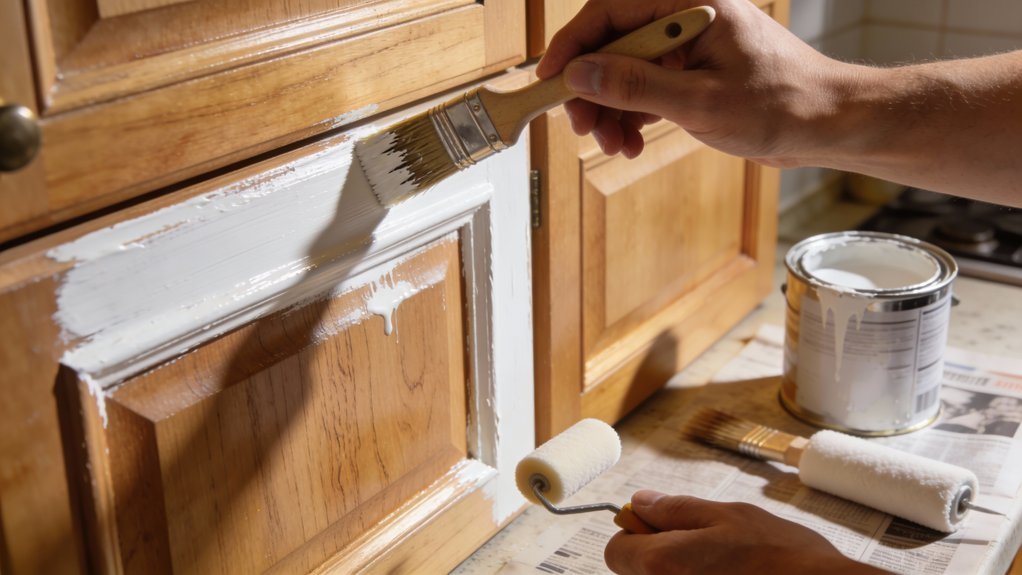
Sanding kitchen cabinets is the worst part of painting them. It’s dusty, tedious, and if your cabinets have detailed molding, it’s nearly impossible to do well. So when people ask how to paint kitchen cabinets without sanding, they’re really asking: is there a legitimate shortcut, or am I setting myself up for peeling paint in six months?
Good news: you can absolutely skip the sanding — if you replace it with the right prep and products. Here’s how to do it so the paint actually sticks.
Why Sanding Exists (And What Replaces It)
Sanding does two things: it removes gloss so paint can grip, and it smooths imperfections. To skip it, you need to handle both jobs another way:
- Deglossing replaces sanding’s grip-creating job. A liquid deglosser (also called liquid sandpaper) chemically etches the surface so primer adheres.
- Bonding primer replaces sanding’s adhesion insurance. This is the non-negotiable hero product — it sticks to glossy surfaces that regular primer slides off.
- Thorough cleaning replaces nothing but enables everything. Paint over grease and it will peel, sanded or not.
How to Paint Kitchen Cabinets Without Sanding: Step by Step
Step 1: Remove doors, drawers, and hardware
Label every door and drawer with painter’s tape (write the location — “upper left of sink”). Remove hinges, knobs, and pulls. This is fiddly but essential; painting around hardware looks amateur and makes doors stick.
Step 2: Clean like you mean it
This is the step that determines success. Kitchen cabinets accumulate years of cooking grease that’s invisible but lethal to paint adhesion. Wash every surface with a degreaser — trisodium phosphate substitute (TSP-PF) or a strong dish soap solution. Then rinse with clean water and let dry completely. If the rinse water beads up anywhere, that spot is still greasy — clean it again.
Step 3: Degloss
Wipe all surfaces with a liquid deglosser following the product directions (usually: apply, wait, wipe off). Wear gloves and ventilate — this stuff is chemical. It dulls the existing finish microscopically, giving the primer tooth. This takes a fraction of the time sanding would.
Step 4: Prime with bonding primer
Apply one coat of a true bonding primer — look for products specifically labeled for glossy surfaces, adhesion-promoting, or “bonds to slick surfaces.” Standard primers are not the same thing. Let it cure per the can’s directions (often longer than dry time — respect the cure time).
Step 5: Paint two thin coats
Use a cabinet-grade enamel — urethane-modified acrylic or alkyd. Thin coats are critical: they level out smooth and cure hard. Thick coats stay soft, show brush marks, and chip. A high-density foam roller gives the smoothest finish on flat areas; a quality angled brush handles details.
Step 6: Cure patiently
Paint feels dry in hours but takes 2–3 weeks to fully harden. Rehang doors carefully, avoid slamming, and don’t scrub for the first month. Most “my no-sand paint job failed” stories are really “I put everything back to full use in 48 hours” stories.
When You Should Sand Anyway
Be honest about your cabinets. Skip sanding only when:
- The existing finish is intact — no peeling, flaking, or chipping. Paint won’t fix failing paint; it just adds a new layer waiting to fail.
- Surfaces are reasonably smooth. Deep scratches, dents, and rough patches need sanding (or filling + sanding) regardless.
- You’re not dealing with wax or silicone contamination — these resist even bonding primers and need special handling.
If the finish is failing, you have to sand or strip — no shortcut survives a bad foundation. Our broader guide to updating kitchen cabinets cheaply covers when painting vs. refacing vs. replacing makes sense.
Product Shortlist
- Deglosser: liquid sandpaper/deglosser from any major brand — they all work similarly.
- Bonding primer: look for “bonding,” “adhesion,” or “for glossy surfaces” on the label. Shellac-based primers are the nuclear option for difficult surfaces.
- Paint: cabinet-specific enamel (alkyd or urethane-acrylic). Don’t use wall paint — it’s too soft for the abuse cabinet doors take.
Cost and Time
Materials run $100–$200 — deglosser, bonding primer, cabinet enamel, brushes/rollers, tape. Time: a full weekend plus cure time. Compare that to the cost of repainting a room — cabinets are more labor but the same principle: prep determines everything.
If your home was built before 1978, check the EPA’s lead paint guidance before disturbing old finishes — even deglossing old paint has safety considerations.
How Long Does a No-Sand Paint Job Actually Last?
The honest durability question: a properly done no-sand cabinet paint job (thorough degrease + deglosser + bonding primer + cabinet enamel + full cure) lasts 5–8 years in a typical kitchen before showing wear — comparable to a sanded job done with the same products. The prep method matters less than the product quality and cure patience.
Where wear appears first:
- Around handles and knobs — hand oils and friction. This is why hardware placement matters: pulling doors by the hardware instead of the painted surface extends life significantly.
- Under-sink doors — moisture and cleaning products. Wipe spills promptly; don’t let water sit on painted surfaces.
- Trash pull-out and frequently-used drawers — pure friction wear. Touch-up paint (save the can!) handles these spots in minutes.
Maintenance that extends life: clean with mild soap and water only (no abrasives, no harsh degreasers on the paint itself), tighten hardware annually (loose handles wobble and chip paint), and keep a small jar of touch-up paint labeled with the color formula. A 10-minute touch-up once a year keeps cabinets looking fresh indefinitely — the difference between a 5-year paint job and a 10-year one is mostly this maintenance, not the original technique.
The Bottom Line
How to paint kitchen cabinets without sanding: clean aggressively, degloss chemically, prime with a true bonding primer, apply two thin coats of cabinet enamel, and let it cure fully. It works — the chemistry is sound — as long as the existing finish is intact and you don’t rush the cure. You trade a dusty weekend of sanding for careful prep and patience, and the result looks just as professional. Your cabinets, your call — but now it’s an informed one.
[…] 20 years. It’s a weekend of work and the highest-impact change on this list. Our guide to painting cabinets without sanding makes it approachable, and updating cabinets cheaply covers all the […]