
 By admin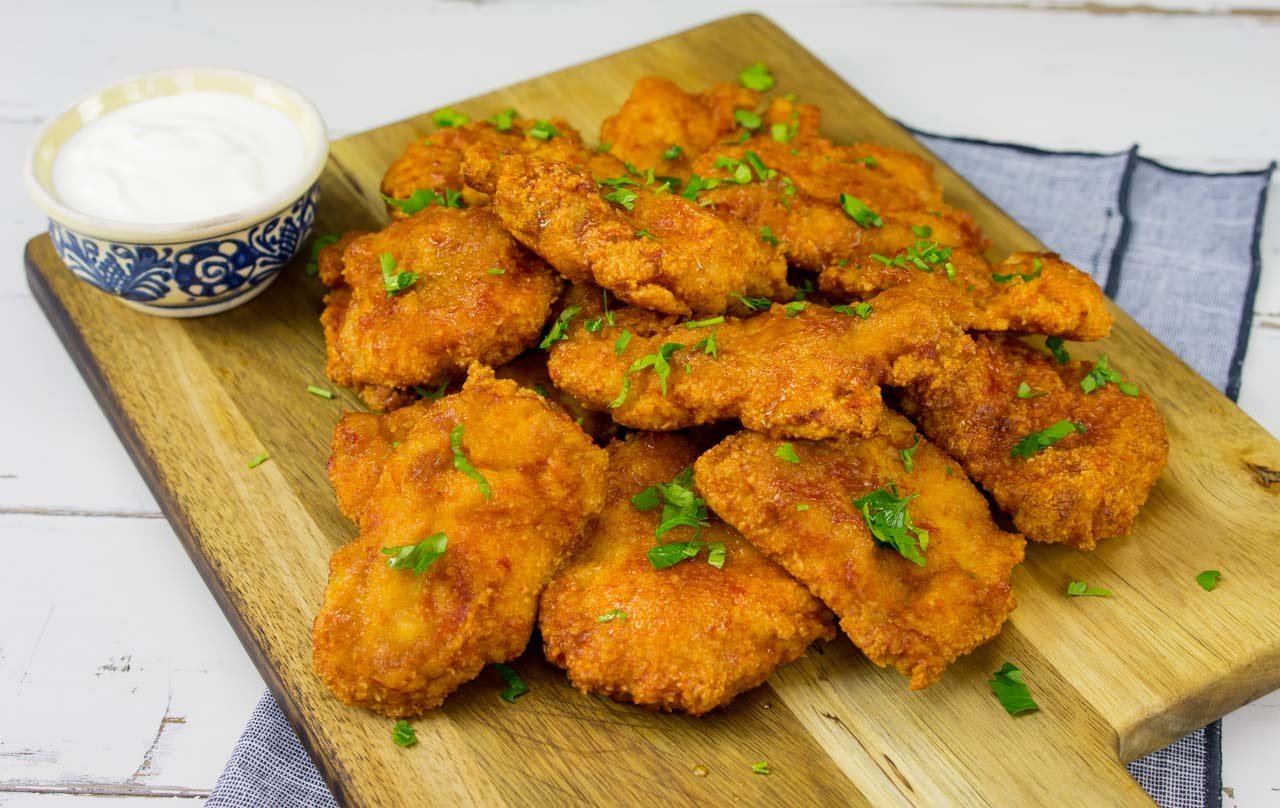
There is crispy fried chicken, and then there is crispy fried chicken — the kind with a shattering, craggy crust that crackles when you bite it and stays crunchy even as it cools. I’ve made every mistake in the book: soggy coating that slid right off, crust that burned before the inside cooked, chicken that tasted great for two minutes and then went limp. After a lot of trial and error (and one memorable kitchen fire scare I’ll spare you the details of), I’ve landed on a method that works in a regular home kitchen with regular equipment.
Great fried chicken comes down to four things: the brine, the dredge, the oil temperature, and patience. Nail all four and you’ll rival any chicken joint in town.
Step 1: Brine It (Don’t Skip This)
Brining is the difference between juicy and dry, full stop. A simple buttermilk brine does two jobs: the salt seasons the meat all the way through, and the mild acidity tenderizes it. For 3 to 4 pounds of chicken pieces, whisk together 2 cups of buttermilk, 2 tablespoons of kosher salt, a tablespoon of hot sauce, and a teaspoon each of garlic powder and black pepper. Submerge the chicken, cover, and refrigerate for at least 4 hours — overnight is even better.
No buttermilk? Make a quick substitute: 2 cups of milk plus 2 tablespoons of white vinegar or lemon juice, left to sit for 10 minutes. It won’t be identical, but it works. And if you’re short on time, even a 1-hour brine beats no brine.
The Crispy Fried Chicken Dredge That Works
The crispiest crusts come from a double dredge with a little cornstarch in the mix. Here’s my ratio: 2 cups all-purpose flour, 1/2 cup cornstarch, 1 tablespoon each of kosher salt, black pepper, paprika, and garlic powder, plus a teaspoon of cayenne if you like heat. The cornstarch is the secret — it fries up lighter and crunchier than flour alone.
Now the technique that creates those craggy, extra-crispy bits: drizzle 3 to 4 tablespoons of your buttermilk brine into the dry flour mixture and rub it in with your fingers until it looks like coarse, shaggy crumbs. Those little clumps fry into the crunchy nubs that make homemade fried chicken better than the fast-food version.
Dredge each piece: lift it from the brine, let the excess drip off, press it firmly into the flour mixture, and set it on a wire rack. Let the coated chicken rest for 15 to 20 minutes before frying. This rest lets the coating hydrate and bond to the chicken so it doesn’t fall off in the oil — the most common rookie mistake.
Step 3: Fry at the Right Temperature
Oil temperature is everything. Too cool (below 325°F) and the chicken absorbs oil and turns greasy. Too hot (above 375°F) and the crust burns before the inside cooks. The sweet spot is 350°F, and you need a thermometer — guessing is how you get raw centers. A $10 clip-on candy thermometer works fine.
Use a heavy pot or Dutch oven with about 1.5 inches of a neutral, high-smoke-point oil — peanut oil is the classic choice, and vegetable or canola oil work too. If you’re wondering what the best oil for deep frying is, peanut and canola top the list for exactly this kind of job.
Fry in batches — crowding the pot drops the temperature and steams the chicken instead of frying it. Three to four pieces at a time is plenty. Dark meat (thighs, drumsticks) takes 12 to 14 minutes; white meat (breasts, wings) takes 10 to 12. Flip once halfway through.
Step 4: Check Doneness and Drain Properly
Color lies. Golden brown doesn’t guarantee cooked through, especially with thick pieces. Use an instant-read thermometer: chicken is safe at 165°F in the thickest part, though many cooks pull dark meat at 175°F for better texture. The USDA Food Safety and Inspection Service sets 165°F as the safe minimum for all poultry — when in doubt, temp it, don’t guess it.
Drain on a wire rack set over a baking sheet, not on paper towels. Paper towels trap steam underneath and soften the bottom crust. A wire rack lets air circulate so every side stays crisp. Season with a tiny extra pinch of salt while it’s hot, then let it rest 5 to 10 minutes before serving — the crust actually gets crunchier as it cools slightly.
Troubleshooting Common Fried Chicken Problems
- Coating falls off: You skipped the rest after dredging, or the chicken went into the oil while the coating was still powdery-dry. Rest 15+ minutes so it hydrates and sticks.
- Soggy, greasy crust: Oil was too cool, or you crowded the pot. Fry fewer pieces and keep the temp at 350°F.
- Burnt outside, raw inside: Oil too hot, or pieces too thick. Pound thick breasts to even thickness, or finish in a 350°F oven after frying.
- Crust goes soft after 10 minutes: You drained on paper towels, or covered it with a lid (trapped steam is the enemy). Wire rack, uncovered, every time.
Make-Ahead and Reheating Tips
Fried chicken is best fresh, but you can absolutely make it work for a crowd. If you’re cooking for a party, fry the chicken up to 2 hours ahead and hold it in a 200°F oven on a wire rack set over a baking sheet — the low heat keeps it crisp without overcooking. Never hold it in a covered container; trapped steam is the enemy of crunch. For leftovers, skip the microwave entirely and reheat in a 375°F oven or air fryer for 10 to 12 minutes. It won’t be quite as shattering as fresh, but it’ll be miles better than soggy microwaved chicken. Cold fried chicken straight from the fridge, by the way, is one of life’s underrated pleasures — picnic tradition for a reason.
Practical Takeaway
Crispy homemade fried chicken is a formula, not luck: buttermilk-brine for at least 4 hours, a flour-plus-cornstarch dredge with shaggy clumps, a 15-minute rest before frying, 350°F oil in uncrowded batches, and a wire rack for draining. Get a thermometer and stop guessing — it’s the single cheapest upgrade you can make. Master this once and you’ll never pay $18 for a chicken sandwich again. Pair it with juicy grilled burgers at your next cookout and you’ll be the undisputed hero of the backyard.