
 By admin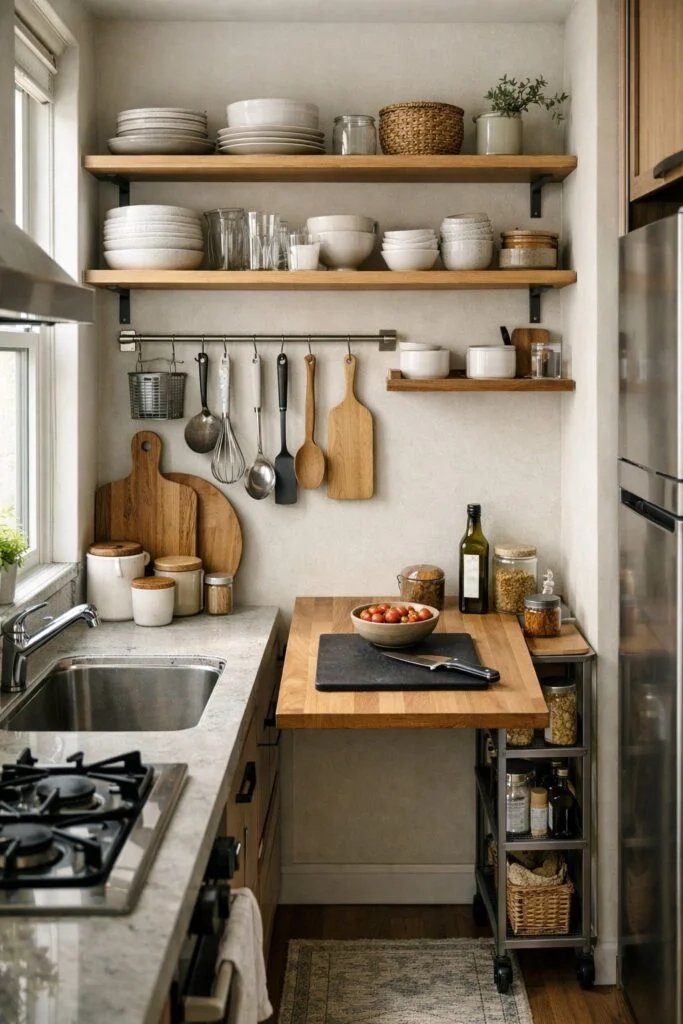
A small kitchen isn’t a curse — it’s a design constraint. Some of the most functional kitchens I’ve cooked in were under 80 square feet, because every inch had a job. If you’re wondering what is the best way to organize a small kitchen, the answer isn’t buying more organizers. It’s deciding what deserves space, then giving everything a precise home.
Step 1: Declutter Before You Organize
Organizing clutter just gives it nicer housing. Pull everything out of one cabinet at a time and be honest: the bread maker you used twice, the chipped mugs, the three vegetable peelers. Small kitchens can’t afford “maybe someday” items. If whole-house clutter is the bigger issue, start with our guide to decluttering your house without getting overwhelmed — the kitchen section alone will free up a cabinet.
What Is the Best Way to Organize a Small Kitchen? Think in Zones
Professional kitchens run on zones, and yours should too. Group items by task, not by type:
- Prep zone: knives, cutting boards, mixing bowls near your main counter.
- Cook zone: pots, pans, spatulas, oils within arm’s reach of the stove.
- Coffee/breakfast zone: mugs, coffee maker, cereal in one spot so mornings run themselves.
- Cleanup zone: dish soap, sponges, towels, and drying rack by the sink.
Zoning cuts the “where did I put the…” wandering that makes small kitchens feel chaotic. It also reveals duplicates — nobody needs two sets of measuring cups.
Go Vertical: Your Walls Are Cabinets You Forgot About
- Magnetic knife strip instead of a counter-hogging block.
- Inside cabinet doors: mount spice racks, lid holders, or a cutting-board slot on the door interior.
- Wall-mounted rail with hooks for utensils, mugs, or pans near the stove.
- Over-sink shelf for dish soap and sponges, freeing counter space.
- Stackable shelf risers inside cabinets to double usable shelf area.
If you’ve maxed out the inside of your cabinets, there are structural options too — our guide to adding storage to a small kitchen covers pull-out shelves, toe-kick drawers, and other upgrades worth the effort.
Tame the Drawers and Cabinets
- Drawer dividers for the utensil drawer. Without them it’s a junk drawer with a fancy name.
- Decant pantry staples into clear, square containers. Square beats round for shelf efficiency, and seeing contents ends the “do we have rice?” mystery.
- File pan lids vertically in a rack instead of stacking — nesting pans with lids on top wastes a shocking amount of space.
- Under-sink: a tension rod across the cabinet holds spray bottles; a small turntable handles the rest.
- Fridge door audit: condiments multiply. Toss the expired, corral the rest in a bin.
Don’t Forget Food Safety
While reorganizing the pantry, check dates and storage rules — flour keeps longer in the freezer, opened nuts belong in airtight containers. FoodSafety.gov’s storage guidance has the official timelines for how long pantry, fridge, and freezer items actually last.
The Small-Appliance Audit
Counter space is prime real estate. Each appliance sitting out pays rent in square inches, so only daily-use items earn a permanent spot — for most people, that’s the coffee maker and nothing else. Weekly-use appliances (toaster, blender) get an accessible cabinet. Anything used monthly or less goes to high shelves or out of the kitchen entirely.
Work With Your Kitchen’s Layout
Every small kitchen has a shape, and each shape has a strategy:
- Galley kitchens (two parallel counters): keep one side for prep and the other for cooking/cleanup. Never store daily items on the far side of the room from where they’re used.
- L-shaped kitchens: the corner is prime real estate — use a lazy Susan or pull-out corner unit so it stops being a black hole.
- Single-wall kitchens: go vertical aggressively. A wall rail, magnetic strips, and over-cabinet storage are non-negotiable here.
- Kitchen with no pantry: dedicate one cabinet as the “pantry” with shelf risers and clear bins, and keep overflow (bulk buys, seasonal items) on a high shelf or in a nearby closet.
The golden rule across all layouts: the items you use most should require the fewest steps. Coffee supplies live next to the coffee maker, not across the kitchen. It sounds obvious, but most disorganized kitchens violate this constantly — which is why they feel exhausting to use.
The One-Time Purge Checklist
Do this once, and your small kitchen stays manageable for years. Be ruthless with:
- Duplicates: two can openers, three spatulas, four wooden spoons. Keep the best one of each.
- Unitaskers: the avocado slicer, banana hanger, and egg separator. A good knife does all three jobs.
- Aspirational appliances: the juicer, the bread maker, the fondue set. If you haven’t used it in a year, it’s decor, not equipment.
- Mismatched food containers: keep only sets with matching lids. Recycle the orphans.
- Expired everything: spices lose potency after a year, baking powder after six months. If it can’t do its job, it’s just taking up space.
Maintain It in 5 Minutes a Night
Organize a Small Kitchen for Under $50
You don’t need a container-store splurge. The highest-impact buys are cheap:
- Tension rods ($8 for two): under-sink spray bottle holder, or stacked vertically in a cabinet as a lid divider.
- Adhesive hooks ($6): inside cabinet doors for measuring cups, or on the wall for mugs.
- Shelf risers ($12 for two): instantly double cabinet shelf space for mugs and cans.
- Clear bins ($10 for four): corral pantry categories — baking, snacks, canned goods — so shelves stay zoned.
- Magnetic strip ($10): knives off the counter, or spice tins on the fridge side.
Total: under $50, one afternoon of work, and a kitchen that functions like it’s twice the size. Buy the organizers after the purge, measuring your actual shelves first — nothing wastes money like organizers that don’t fit.
Organization dies without maintenance. End each day with a five-minute reset: dishes in the dishwasher, counters wiped, everything back in its zone. It’s the kitchen version of making the bed — small effort, outsized calm. A tiny kitchen that’s reset nightly feels bigger than a large one that’s chaotic.