
 By admin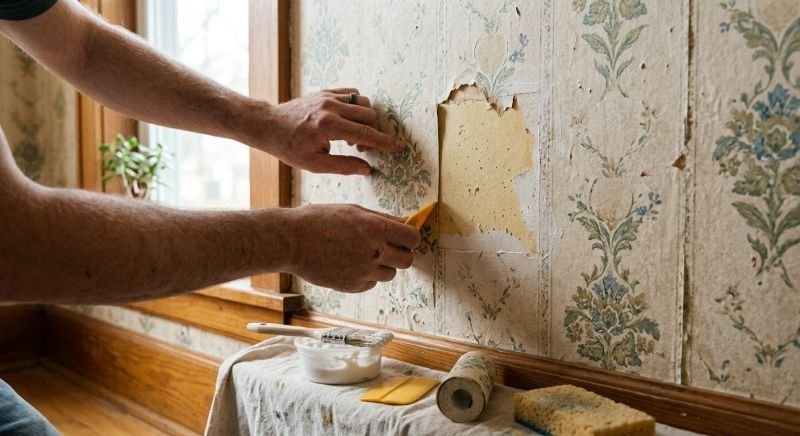
Old wallpaper is the fossil record of previous owners’ taste — floral explosions from the ’80s, sponge-painted borders from the ’90s, all of it mocking you from the walls. Removing it has a reputation as a nightmare job, and it can be — but only if you attack it wrong. Done right, removing old wallpaper is straightforward. Done wrong, you’ll gouge the drywall and spend days repairing it.
Here’s how to remove old wallpaper easily, whatever kind you’re dealing with.
Step 1: Identify Your Wallpaper Type
What you’re up against determines the approach:
- Strippable wallpaper: Modern wallpapers often peel off dry in full sheets. Test a corner — pull gently from the bottom. If it comes away cleanly, congratulations: this is a 30-minute job.
- Peelable wallpaper: The top vinyl/decorative layer peels off, leaving a paper backing stuck to the wall. Peel the top layer, then deal with the backing (below).
- Traditional pasted wallpaper: The old-school kind, glued directly to the wall. This needs water or steam — the main event of this guide.
- Wallpaper over wallpaper: Multiple layers. Remove one layer at a time, starting from the top.
- Wallpaper on unprimed drywall: The nightmare scenario — the paper backing bonds to the drywall paper. Go slow, use minimal water, and accept some skim-coating afterward.
Step 2: Prep the Room
- Remove outlet and switch covers, and cover outlets with tape.
- Lay drop cloths — this gets wet and messy.
- Have ready: a 3–4″ putty knife or wallpaper scraper, a scoring tool, a pump sprayer or sponge, hot water, and patience.
- Turn off power to outlets in the work area if you’ll be using lots of water near them.
Step 3: Score, Soak, Scrape
This is the core technique for pasted wallpaper:
- Score the wallpaper with a scoring tool (like a Paper Tiger, $10–$15). Light pressure — you’re perforating the surface so water can penetrate, not gouging the wall. Skip scoring on already-porous paper backings.
- Soak with hot water. Use a pump sprayer ($15) or sponge with hot water and a squirt of dish soap or fabric softener. Spray a 3–4 foot section generously. The goal is saturating the adhesive, not flooding the wall.
- Wait 10–15 minutes. Let the water work. This is the step impatient people skip, and it’s why they struggle.
- Scrape gently with a putty knife held at a low angle. Work from seams and loose edges. If it resists, soak more — never force it. Forcing gouges drywall.
- Repeat section by section. Put on a podcast. This is meditative once you find the rhythm.
The Steam Option
A wallpaper steamer ($50–$70 to buy, or rent for ~$25/day) is the pro tool for stubborn paper. Hold the steam plate on a section for 10–15 seconds, then scrape — the paper often comes off in satisfying sheets. Steam is faster than spraying for large areas and uses less water overall (better for unprimed drywall). For a whole house of wallpaper, renting a steamer is worth every penny.
Dealing With Leftover Adhesive
Getting the paper off is half the job. The sticky residue must go too, or your new paint will fail:
- Wash walls with hot water and TSP substitute (trisodium phosphate alternative) using a sponge.
- Rinse with clean water.
- Let dry completely, then run your hand over the wall — any tacky or rough spots need another pass.
- Prime with an oil-based or shellac primer before painting. This seals any remaining adhesive and prevents it from bleeding through the new paint. Don’t skip this — it’s the difference between a lasting paint job and one that bubbles in six months.
Repairing the Damage
Some wall damage is normal, especially with old paper:
- Small gouges and tears: fill with lightweight spackle, sand smooth when dry.
- Torn drywall paper (fuzzy brown spots): seal with oil-based primer first (water-based makes it bubble), then skim-coat with joint compound.
- Large damaged areas: skim-coat the whole wall with a thin layer of joint compound — it’s easier than it sounds and gives a fresh surface.
Our guide to patching drywall holes covers the repair techniques in detail.
What Comes Next
Once the walls are clean, sealed, and primed, you’re ready for paint. If you’re refreshing the whole room, our guide to repainting costs helps you budget. And if your home was built before 1978, check the EPA’s lead paint guidance — old wallpaper sometimes covers old lead paint, and disturbing it has safety rules.
Wallpaper Removal Tools Worth Buying vs. Skipping
- Worth buying: a pump sprayer ($15). Faster, more even soaking than a sponge, and keeps your arms from giving out. The single best purchase for this job.
- Worth buying: a scoring tool ($10–$15). Essential for vinyl-coated or painted-over wallpaper. Useless on porous paper — test first.
- Worth buying: a good 3″ putty knife. Flexible enough not to gouge, stiff enough to scrape. The $3 one is fine; technique matters more than the tool.
- Worth renting: a wallpaper steamer ($25/day). For whole rooms or stubborn paper, it halves the time. For one accent wall, skip it.
- Skip: chemical wallpaper removers. Hot water with a squirt of dish soap works as well as the $12 enzyme sprays for most papers. Save your money.
- Skip: expensive “wallpaper removal kits.” The bundled kits charge $30 for a sprayer, scorer, and scraper you can buy separately for $20 — and the included chemicals are unnecessary.
- Nice to have: a garden sprayer with hot water + fabric softener. The old-timer’s recipe (hot water + a capful of fabric softener) genuinely helps dissolve paste. It’s not magic, but it’s cheap and it works.
Total sensible toolkit: under $40 owned, or $65 with a steamer rental. Anyone selling you a $100 “wallpaper removal system” is selling you marketing.
The Bottom Line
How to remove old wallpaper easily: test-peel a corner first (you might get lucky), then score, soak with hot water, wait, and scrape gently — or rent a steamer for big jobs. Never force it; re-soak instead. Wash off all adhesive residue, prime with oil-based or shellac primer, repair any gouges, and you’re ready for paint. It’s a sweaty weekend, not a tragedy — and the room underneath has been waiting decades to breathe.