
 By admin
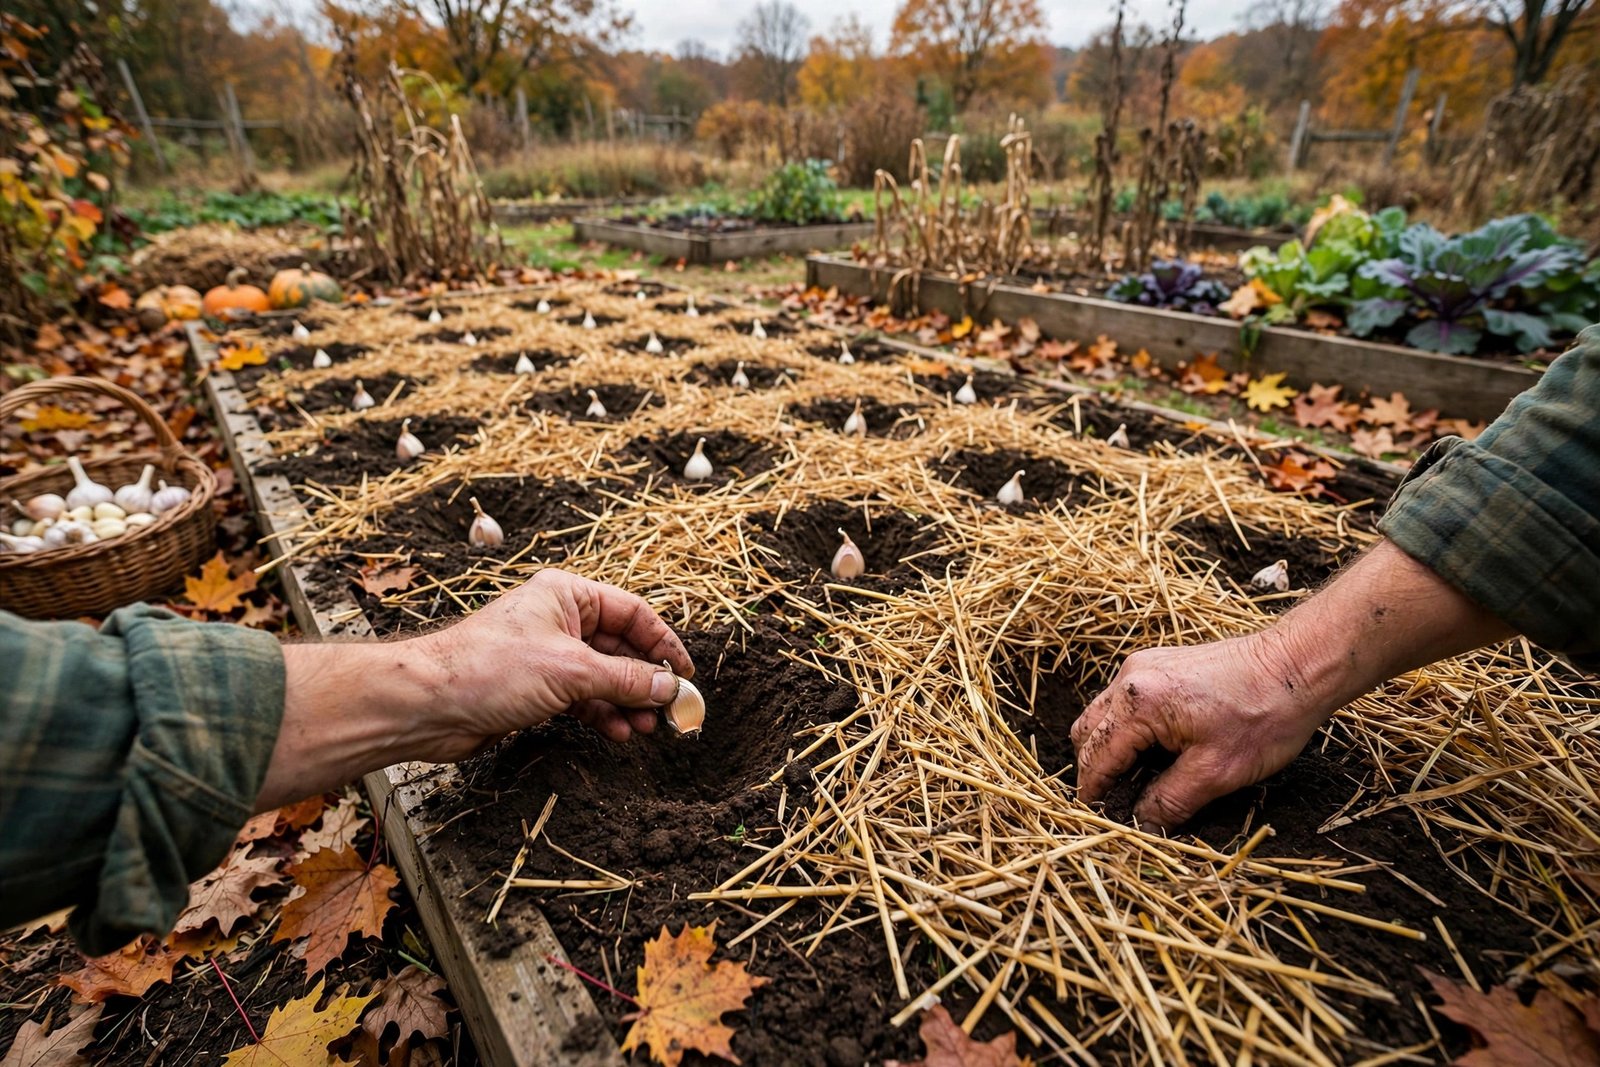
Garlic is the perfect first crop for a nervous gardener. It’s nearly indestructible, asks for almost nothing, repels pests rather than attracting them, and rewards you months later with bulbs that taste dramatically better than anything from a store. If you can push a clove into dirt in the fall, you can grow garlic — and this step-by-step guide covers exactly how, from choosing cloves to curing your harvest.
Step 1: Choose the Right Garlic (October Matters More Than You Think)
Garlic comes in two types. Hardneck varieties produce a flowering stalk (the delicious “scape”), handle cold winters, and offer complex flavors — they’re the connoisseur’s choice and the right pick for most of the US. Softneck varieties (what’s in grocery stores) store longer, braid beautifully, and suit warm-winter climates like Southern California and the Gulf Coast.
Critical: don’t plant grocery-store garlic if you can avoid it. It’s often treated with sprout inhibitors, may carry disease, and is usually a variety poorly suited to your climate. Order seed garlic from a reputable supplier — it costs a few dollars more and performs dramatically better. One pound of seed garlic plants roughly a 4×8 foot bed and yields 30–40 bulbs.
Step 2: Time Your Planting (Fall Is Garlic Season)
Garlic is planted in fall, not spring — typically 4–6 weeks before your ground freezes, which means October through November for most of the US. The cloves establish roots before winter, go dormant in the cold (which they need — garlic requires a chilling period to form bulbs), and surge upward in spring.
If you missed the fall window, you can still plant in very early spring in cold climates, but expect smaller bulbs — the chilling requirement is non-negotiable for full-size heads. Mark your calendar now for next October; garlic rewards planners.
Step 3: Prepare the Bed (Garlic’s Only Real Demand)
Garlic’s one fussiness: it hates wet feet. Choose a spot with full sun and good drainage — raised beds are ideal. Work 2–3 inches of compost into the top 6 inches of soil; garlic is a moderate feeder and appreciates the organic matter. Aim for loose, friable soil — compacted clay produces stunted bulbs.
Test your soil pH if you’re keen: garlic prefers 6.0–7.0, slightly acidic to neutral. Most garden soils fall in this range naturally. If you’re new to bed preparation generally, starting a garden as a beginner covers the fundamentals that apply to every crop.
Step 4: Plant the Cloves (The Satisfying Part)
Break bulbs into individual cloves the day you plant (not earlier — exposed cloves dry out). Plant only the plump outer cloves; save small inner ones for cooking. Push each clove pointy-end-up, 2 inches deep and 6 inches apart, in rows 8–10 inches apart. Mulch heavily — 4–6 inches of straw or shredded leaves — which insulates against freeze-thaw cycles and suppresses spring weeds.
Then walk away. Seriously. Garlic needs nothing from you all winter. This is why it’s the perfect beginner crop — the hardest work is a single October afternoon.
Step 5: Spring Care (Minimal but Timed Right)
When green shoots emerge in spring, ensure consistent moisture — about an inch of water per week if rain doesn’t provide it. Side-dress with a balanced fertilizer or more compost when plants are 6 inches tall. Pull any weeds that poke through the mulch; garlic competes poorly.
If you planted hardneck, you’ll get scapes — curly flower stalks — in early summer. Snap them off when they curl once: this redirects energy into the bulb (increasing size 20–30 percent) and gives you a delicacy chefs pay good money for. Sauté scapes like asparagus; you’ll understand the hype immediately.
Step 6: Harvest at the Right Moment (The Skill That Matters)
Harvest timing makes or breaks your crop. Too early: small, immature bulbs. Too late: the wrapper skins split and bulbs won’t store. The signal: when the bottom 2–3 leaves turn brown but 4–5 green leaves remain (each green leaf corresponds to a wrapper layer protecting the bulb). This is usually mid-summer, varying by climate.
Loosen with a garden fork — never pull by the stem — and lift gently. Test one bulb first if unsure; you can always wait a few days. One under-harvested test bulb teaches more than any calendar date.
Step 7: Cure and Store (Protect Your Harvest)
Curing is non-negotiable for storage. Hang or lay bulbs in a warm, dry, airy spot out of direct sun for 3–4 weeks — a garage, barn, or covered porch works. Once the necks are dry and papery, trim roots, cut stalks (or braid softnecks), and store in a cool (60–65°F), dry, dark place with airflow. Properly cured hardneck stores 4–6 months; softneck up to 9.
Save your biggest, healthiest bulbs for replanting — this is how garlic improves year after year, adapting to your specific soil and climate. Within three seasons, you’ll have a locally adapted strain no store can sell you. The University of Minnesota Extension offers excellent region-specific garlic guidance, and the Old Farmer’s Almanac planting calendars help nail your local timing.
Saving Your Own Seed Garlic (The Compounding Trick)
Here’s where garlic gets truly rewarding: each harvest, set aside your biggest, healthiest bulbs for replanting instead of eating them. It feels extravagant the first time — those prize bulbs were destined for roast chicken — but it’s how garlic adapts to your specific garden. Over 3–4 seasons, your saved seed produces plants increasingly tuned to your soil, your climate, and your care patterns. Commercial seed garlic, however good, was adapted to someone else’s farm.
Select ruthlessly: only replant bulbs that are large, tight-skinned, and disease-free, from your most vigorous plants. Never replant small or damaged bulbs hoping they’ll improve — garlic doesn’t work that way; it amplifies what you plant. Within a few years you’ll have a personal strain that outperforms anything you could buy, and you’ll never purchase seed garlic again. It’s the closest thing gardening has to compound interest, and it starts with the discipline to save the best instead of eating it. If garlic has sparked a broader gardening interest, taking up gardening as a relaxing hobby is the natural next step.
Conclusion
Growing garlic at home is seven steps spread across eight months, with the total active work fitting into a few afternoons: choose seed garlic, plant in fall, mulch, water in spring, cut scapes, harvest by leaf count, cure properly. The return — dozens of bulbs better than anything you’ve bought, plus a gardening confidence that transfers to every future crop — makes it the highest-ROI project in the home garden. Plant this October; thank yourself next July.
Frequently Asked Questions
Can I grow garlic indoors?
For bulbs, no — garlic needs winter chilling and full sun that indoor setups can’t easily provide. You can grow garlic greens indoors year-round (plant cloves in pots for tasty shoots), but full bulbs need the outdoor cycle.
Why did my garlic produce small bulbs?
The usual suspects: planted too late (missed fall root establishment), harvested too early or late, insufficient sun, or crowded spacing. Small seed cloves also produce small bulbs — always plant the fattest cloves.
Do I need to fertilize garlic?
Moderate feeding helps. Compost at planting plus one spring side-dressing is sufficient for most soils. Avoid high-nitrogen fertilizers late in the season — they promote leafy growth at the expense of bulb development.
Can I plant garlic from the grocery store?
You can, but results are unreliable — store garlic is often treated against sprouting, may carry disease, and is usually a softneck variety unsuited to cold climates. Seed garlic from a supplier costs little more and performs far better.